| 知乎专栏 |
项目目录下面创建 ci_settings.xml 文件
<settings xmlns="http://maven.apache.org/SETTINGS/1.1.0" xmlns:xsi="http://www.w3.org/2001/XMLSchema-instance"
  xsi:schemaLocation="http://maven.apache.org/SETTINGS/1.1.0 http://maven.apache.org/xsd/settings-1.1.0.xsd">
  <servers>
    <server>
      <id>gitlab-maven</id>
      <configuration>
        <httpHeaders>
          <property>
            <name>Job-Token</name>
            <value>${env.CI_JOB_TOKEN}</value>
          </property>
        </httpHeaders>
      </configuration>
    </server>
  </servers>
</settings>
修改 pom.xml 文件添加下面内容
<repositories>
  <repository>
    <id>gitlab-maven</id>
    <url>${env.CI_API_V4_URL}/projects/${env.CI_PROJECT_ID}/packages/maven</url>
  </repository>
</repositories>
<distributionManagement>
  <repository>
    <id>gitlab-maven</id>
    <url>${CI_API_V4_URL}/projects/${env.CI_PROJECT_ID}/packages/maven</url>
  </repository>
  <snapshotRepository>
    <id>gitlab-maven</id>
    <url>${CI_API_V4_URL}/projects/${env.CI_PROJECT_ID}/packages/maven</url>
  </snapshotRepository>
</distributionManagement>
修改 .gitlab-ci.yml 添加 Maven 部署命令
Docker 执行器
deploy:
  image: maven:3.6-jdk-11
  script:
    - 'mvn deploy -s ci_settings.xml'
  only:
    - main
Shell 执行器
deploy:
  script:
    - 'mvn deploy -s ci_settings.xml'
  only:
    - main
Maven 部署的软件包
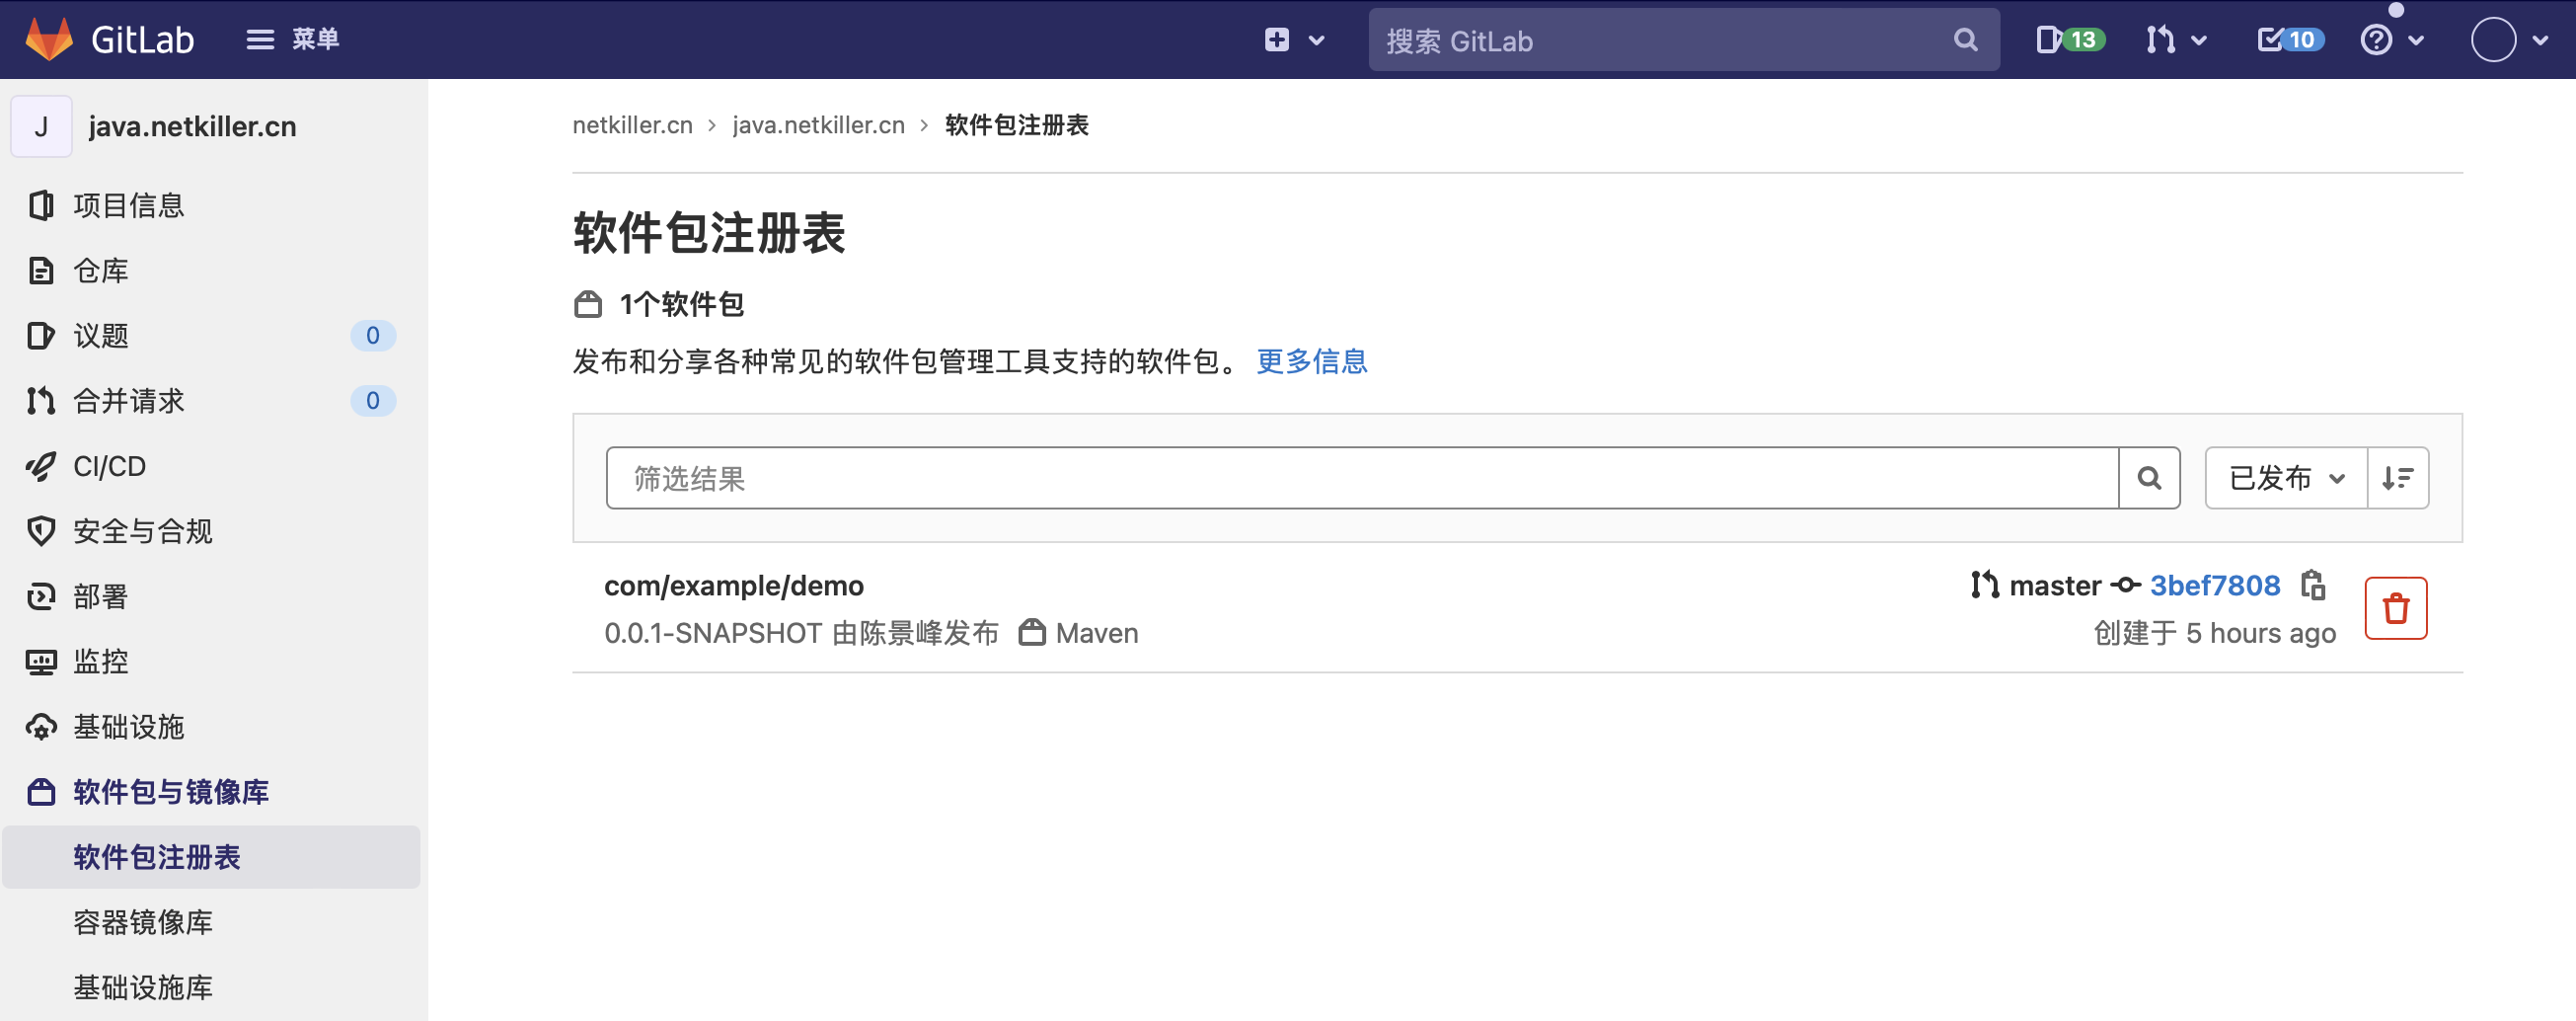 |
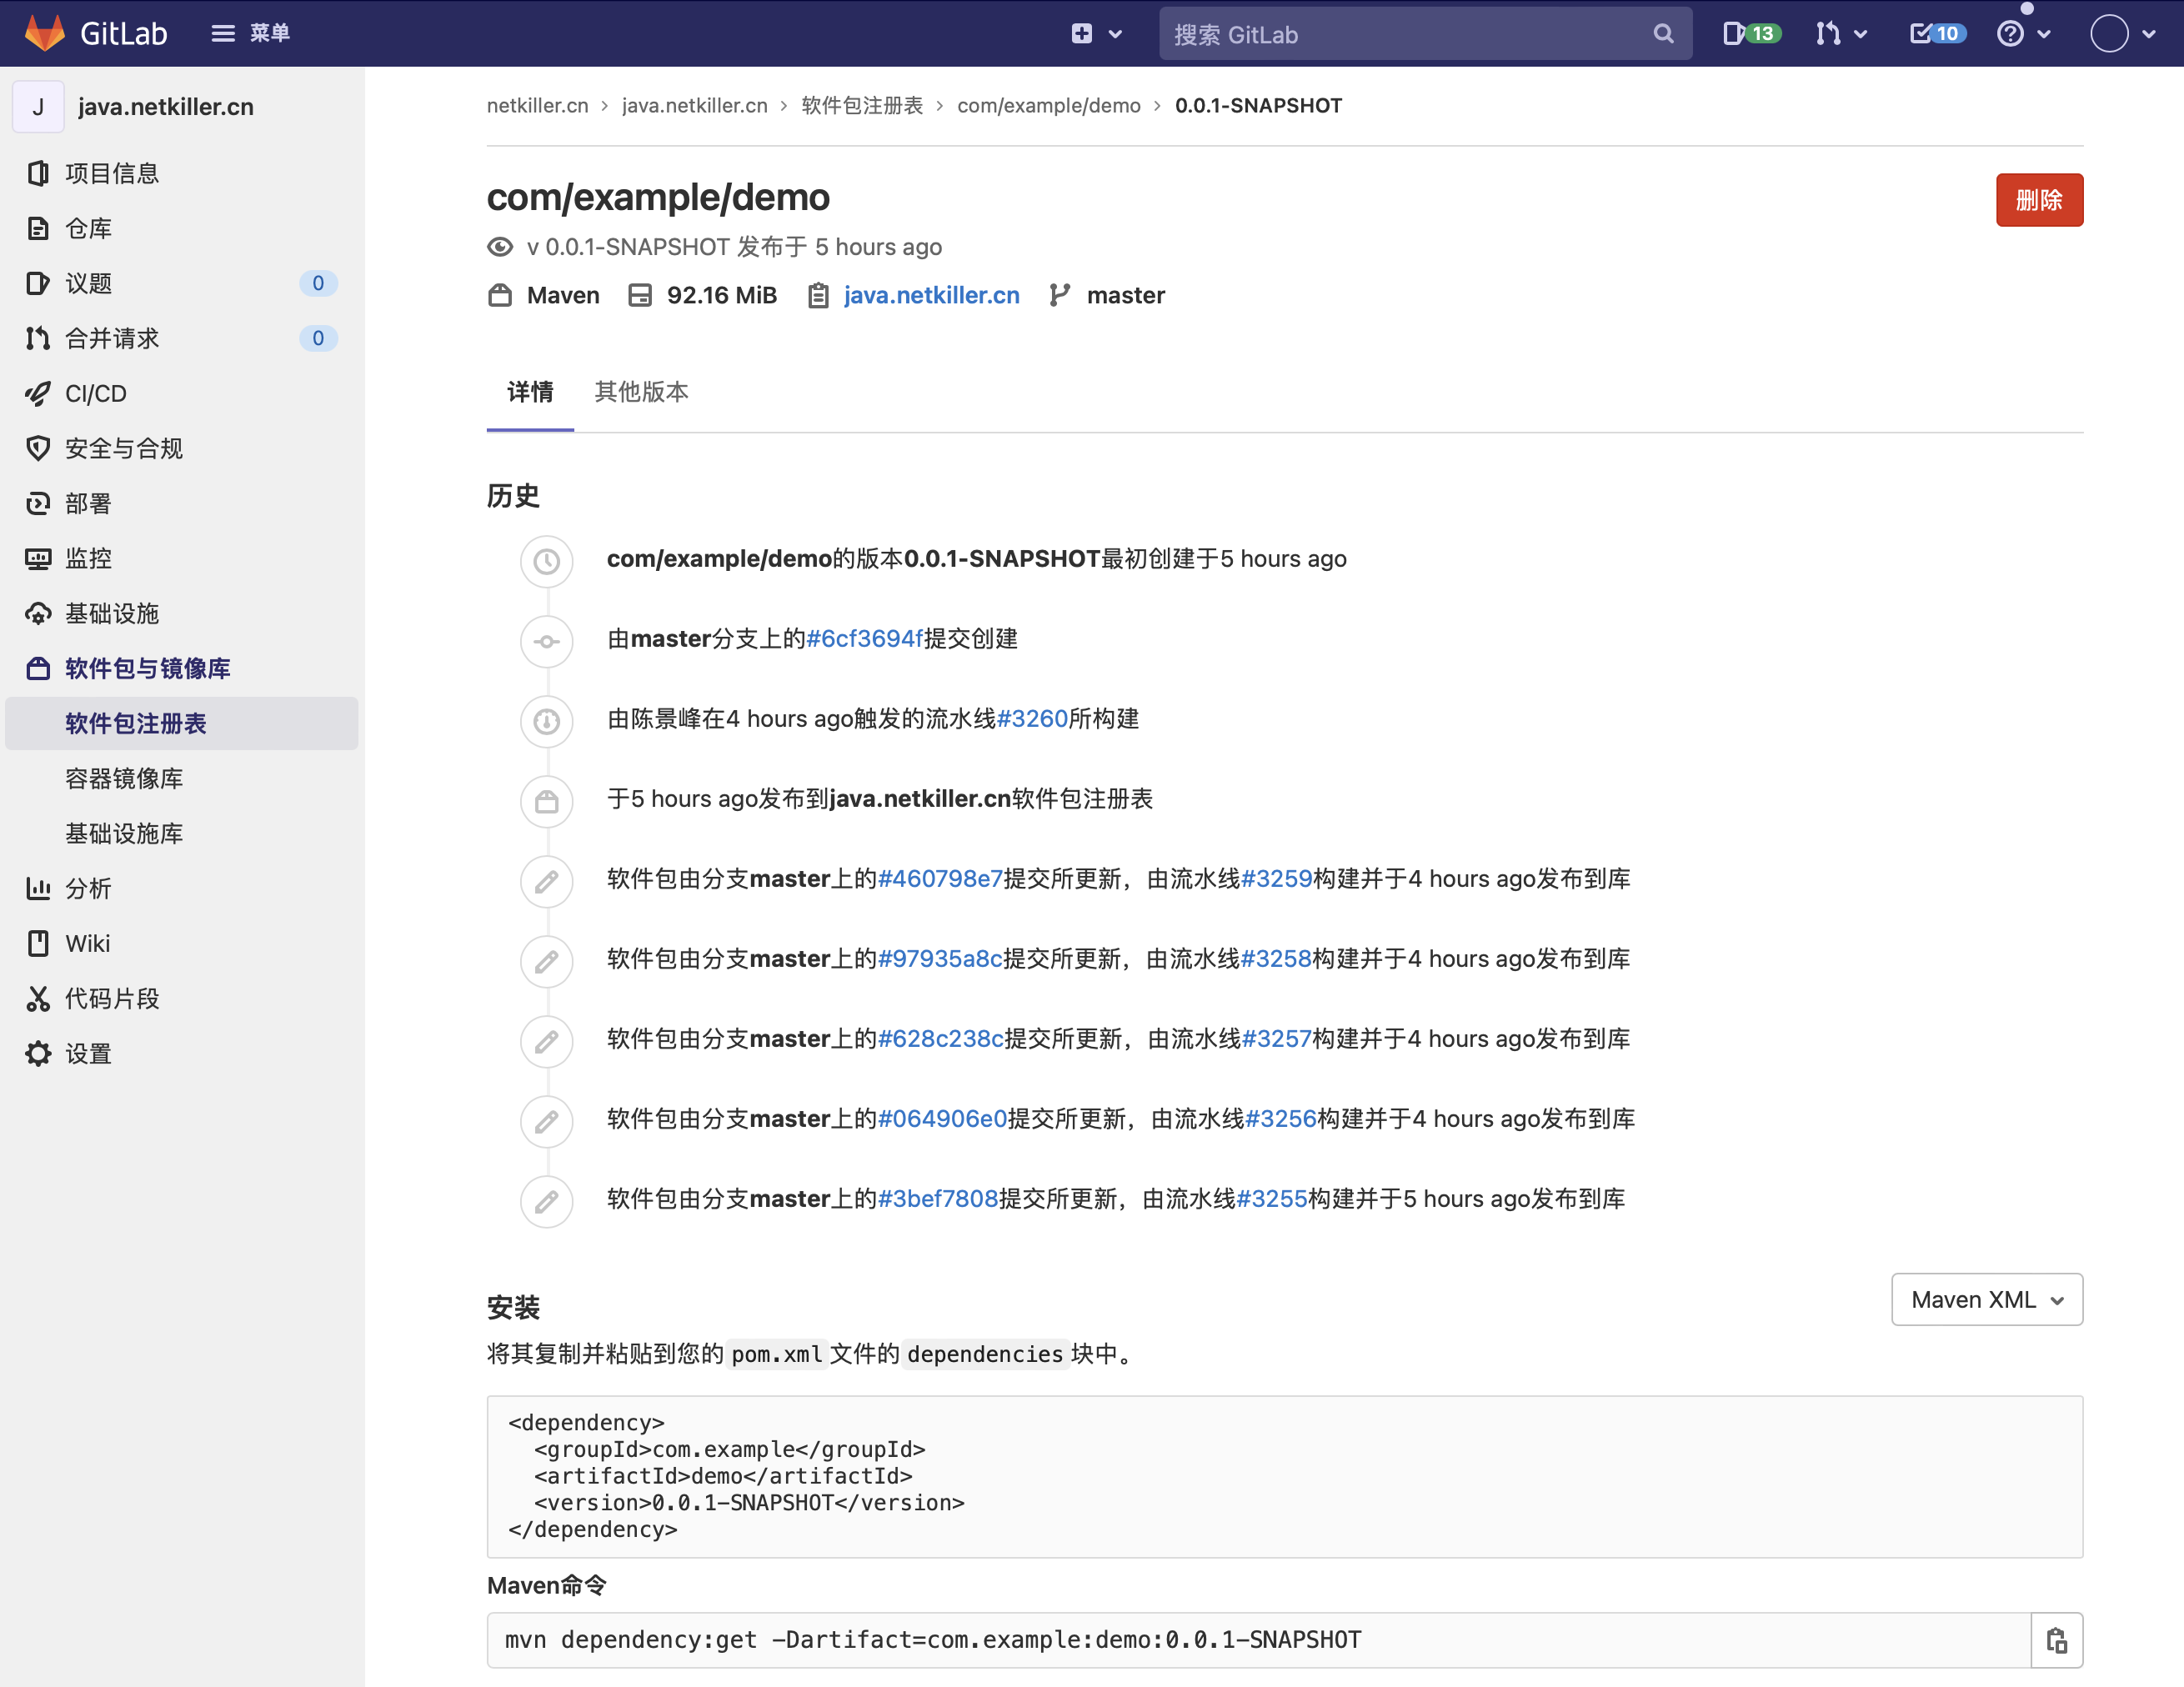
进入查看详情
 |
package:
  stage: deploy
  variables:
    GIT_STRATEGY: none
  script:
    - mvn deploy:deploy-file -DrepositoryId=gitlab-maven -Durl=http://registry.netkiller.cn/api/v4/projects/14/packages/maven -Dpackaging=jar -Dfile=lib/cfca.jar -DgroupId=cn.netkiller -DartifactId=cfca -Dversion=1.0.0 -Dmaven.test.skip=true -s .ci_settings.xml
    - mvn deploy:deploy-file -DrepositoryId=gitlab-maven -Durl=http://registry.netkiller.cn/api/v4/projects/14/packages/maven -Dpackaging=jar -Dfile=lib/ra-toolkit-3.6.28.2.jar -DgroupId=cn.netkiller -DartifactId=ra-toolkit -Dversion=3.6.28.2 -Dmaven.test.skip=true -s .ci_settings.xml
    - mvn deploy -s .ci_settings.xml -Dmaven.test.skip=true
  when: manual
  allow_failure: true
  only:
    - testing
创建或编辑 ~/.pypirc 文件
[distutils]
index-servers =
gitlab
[gitlab]
repository = https://gitlab.example.com/api/v4/projects/<project_id>/packages/pypi
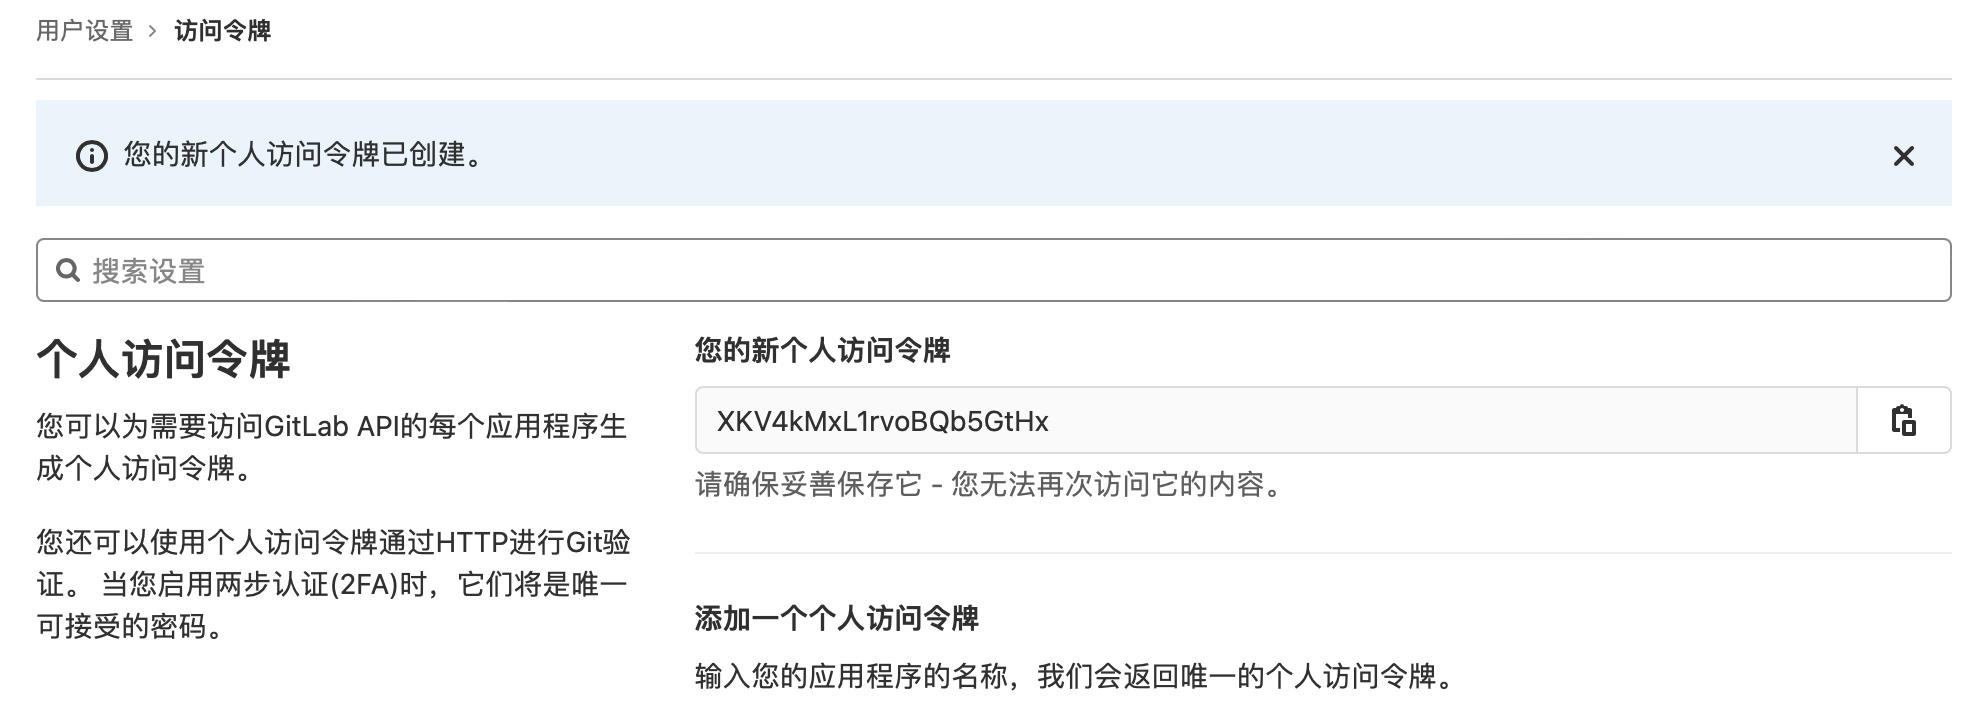
username = <your_personal_access_token_name>
password = <your_personal_access_token>
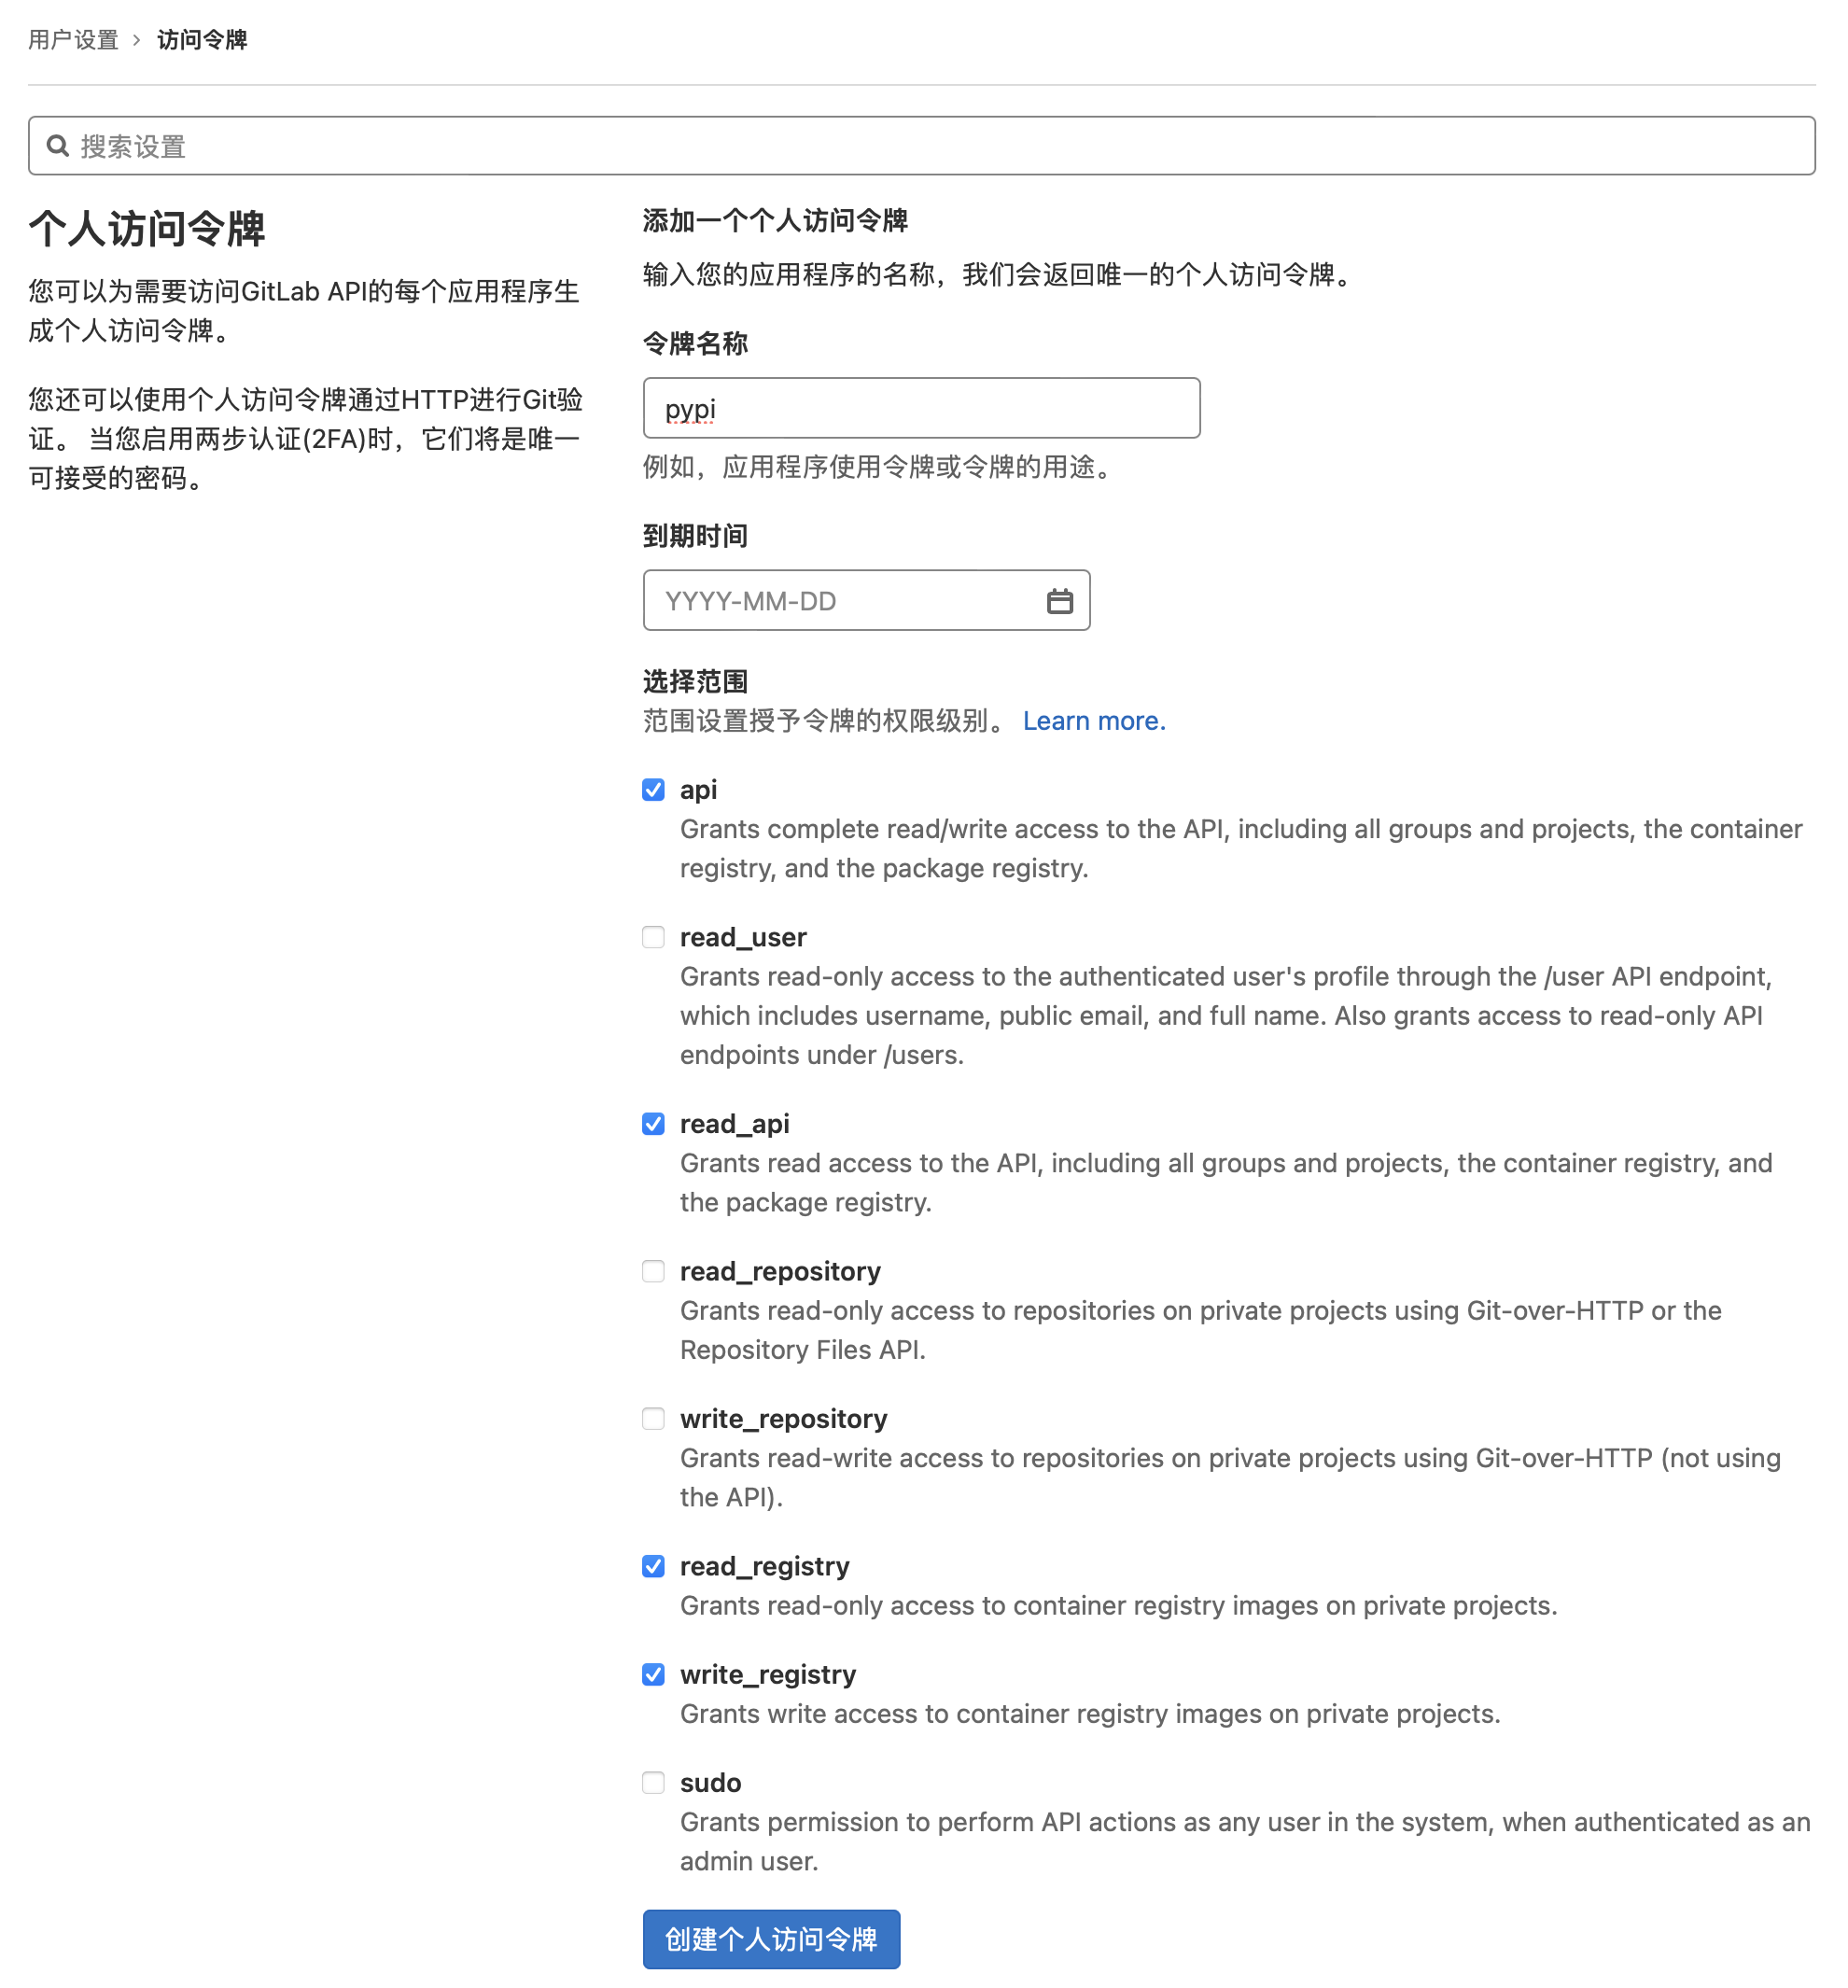
用户和密码,可以使用个人访问令牌、部署令牌和 Gitlab 用户密码
<project_id> 替换成你的项目URL 或者 项目 ID

例如我的项目地址是:http://registry.netkiller.cn/netkiller.cn/python.netkiller.cn/-/packages

repository = https://gitlab.example.com/api/v4/projects/netkiller.cn%2Fpython.netkiller.cn/packages/pypi

将 “/” 替换成 “%2F”
查看项目 ID
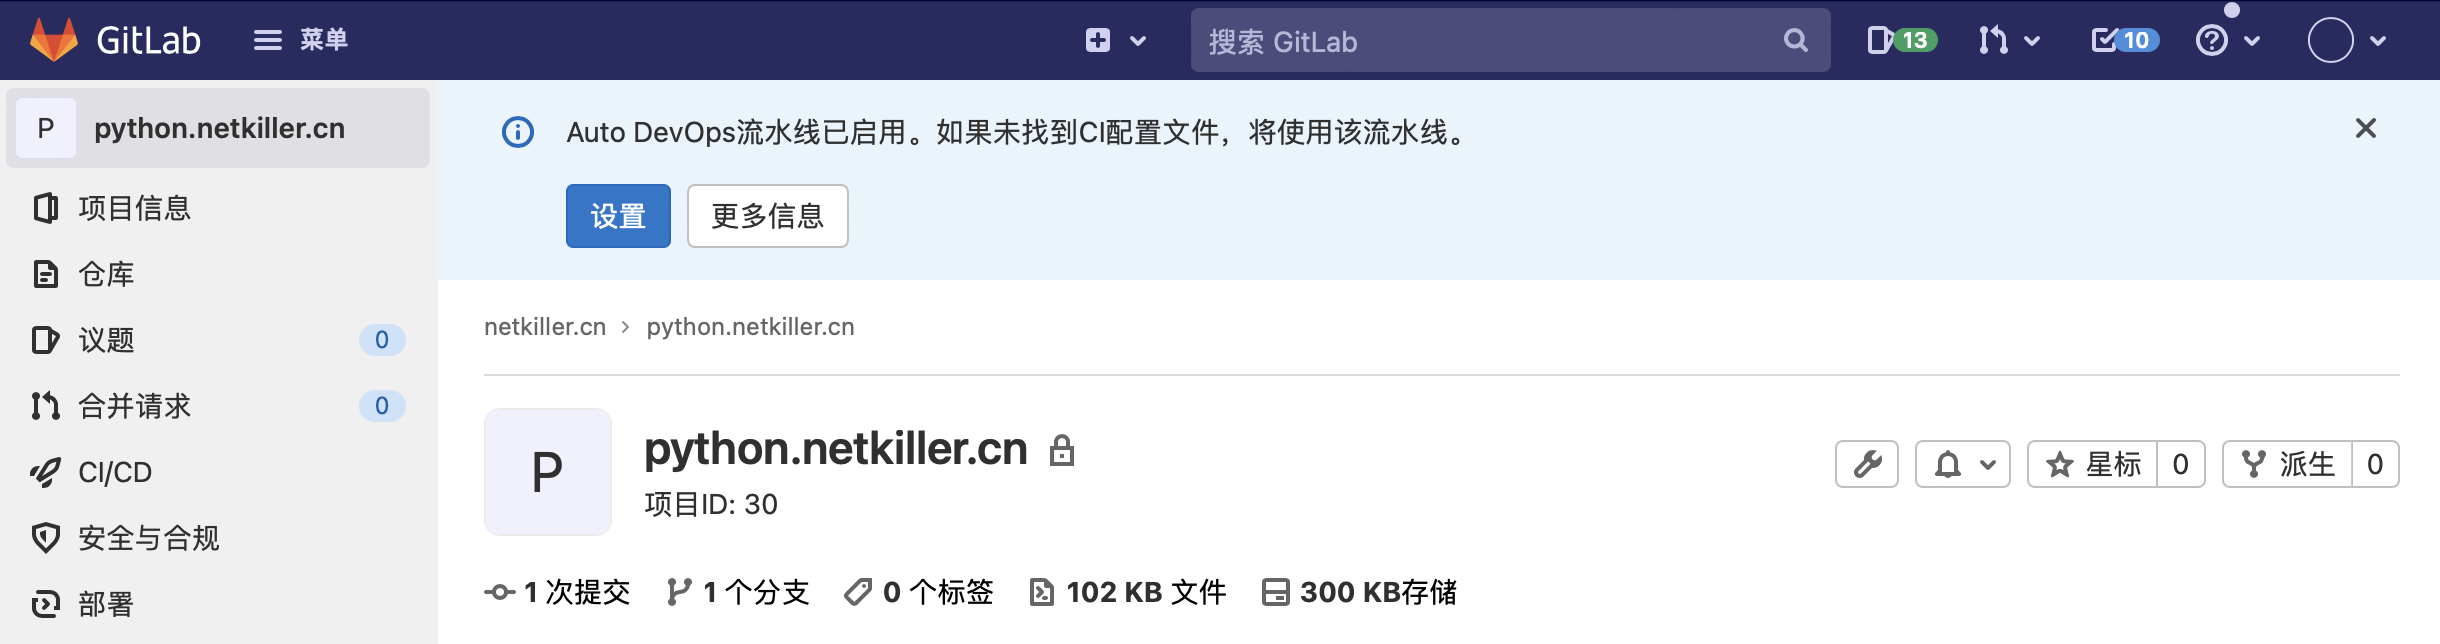 |
下面是我配置,仅供参考
Neo-iMac:devops neo$ cat ~/.pypirc
[distutils]
index-servers =
    gitlab

[gitlab]
repository = http://registry.netkiller.cn/api/v4/projects/30/packages/pypi
username=pypi
password=QFatUEzEybBR6gxxF5K2
上传命令
Neo-iMac:devops neo$ python3 setup.py sdist bdist_wheel
Neo-iMac:devops neo$ twine upload --repository gitlab dist/*
上传演示
Neo-iMac:devops neo$ twine upload --repository gitlab dist/netkiller-devops-0.3.*
Uploading distributions to http://registry.netkiller.cn/api/v4/projects/30/packages/pypi
Uploading netkiller-devops-0.3.0.tar.gz
100%|███████████████████████████████████████████████████████████████████| 37.3k/37.3k [00:00<00:00, 426kB/s]
Uploading netkiller-devops-0.3.1.tar.gz
100%|███████████████████████████████████████████████████████████████████| 37.3k/37.3k [00:00<00:00, 462kB/s]
Uploading netkiller-devops-0.3.2.tar.gz
100%|███████████████████████████████████████████████████████████████████| 37.3k/37.3k [00:00<00:00, 436kB/s]
Uploading netkiller-devops-0.3.3.tar.gz
100%|███████████████████████████████████████████████████████████████████| 37.5k/37.5k [00:00<00:00, 486kB/s]
Uploading netkiller-devops-0.3.4.tar.gz
100%|███████████████████████████████████████████████████████████████████| 37.4k/37.4k [00:00<00:00, 475kB/s]
Uploading netkiller-devops-0.3.5.tar.gz
100%|███████████████████████████████████████████████████████████████████| 37.5k/37.5k [00:00<00:00, 490kB/s]
Neo-iMac:devops neo$
查看软件包
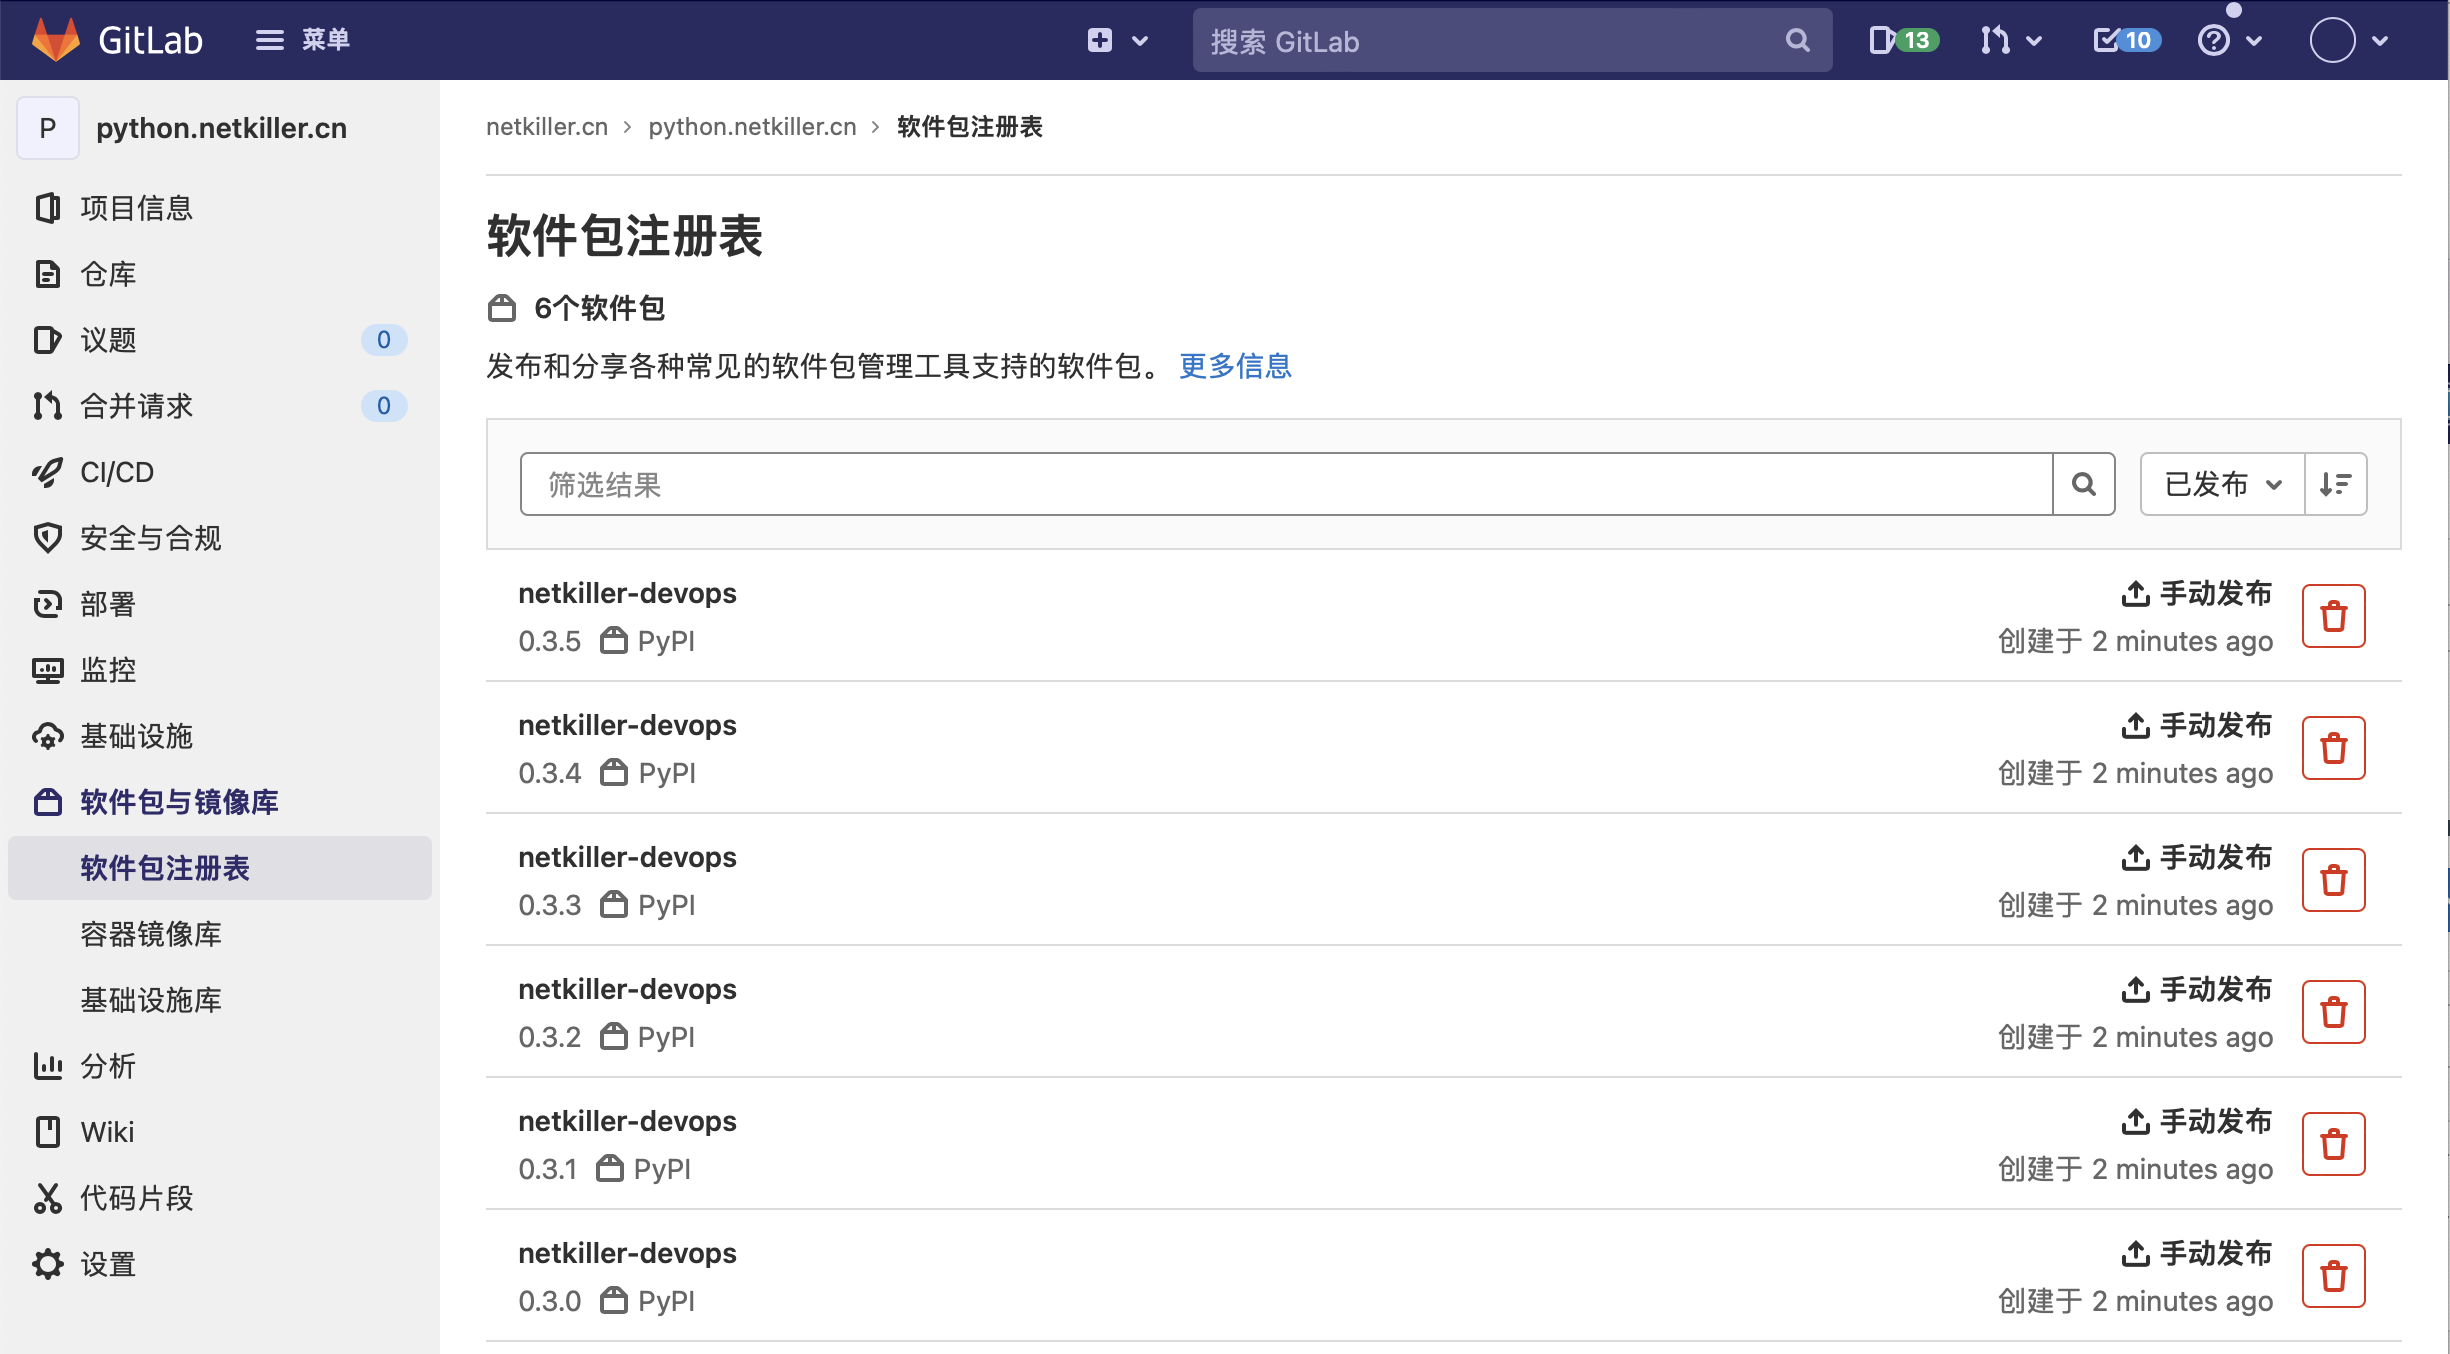 |
查看详细信息
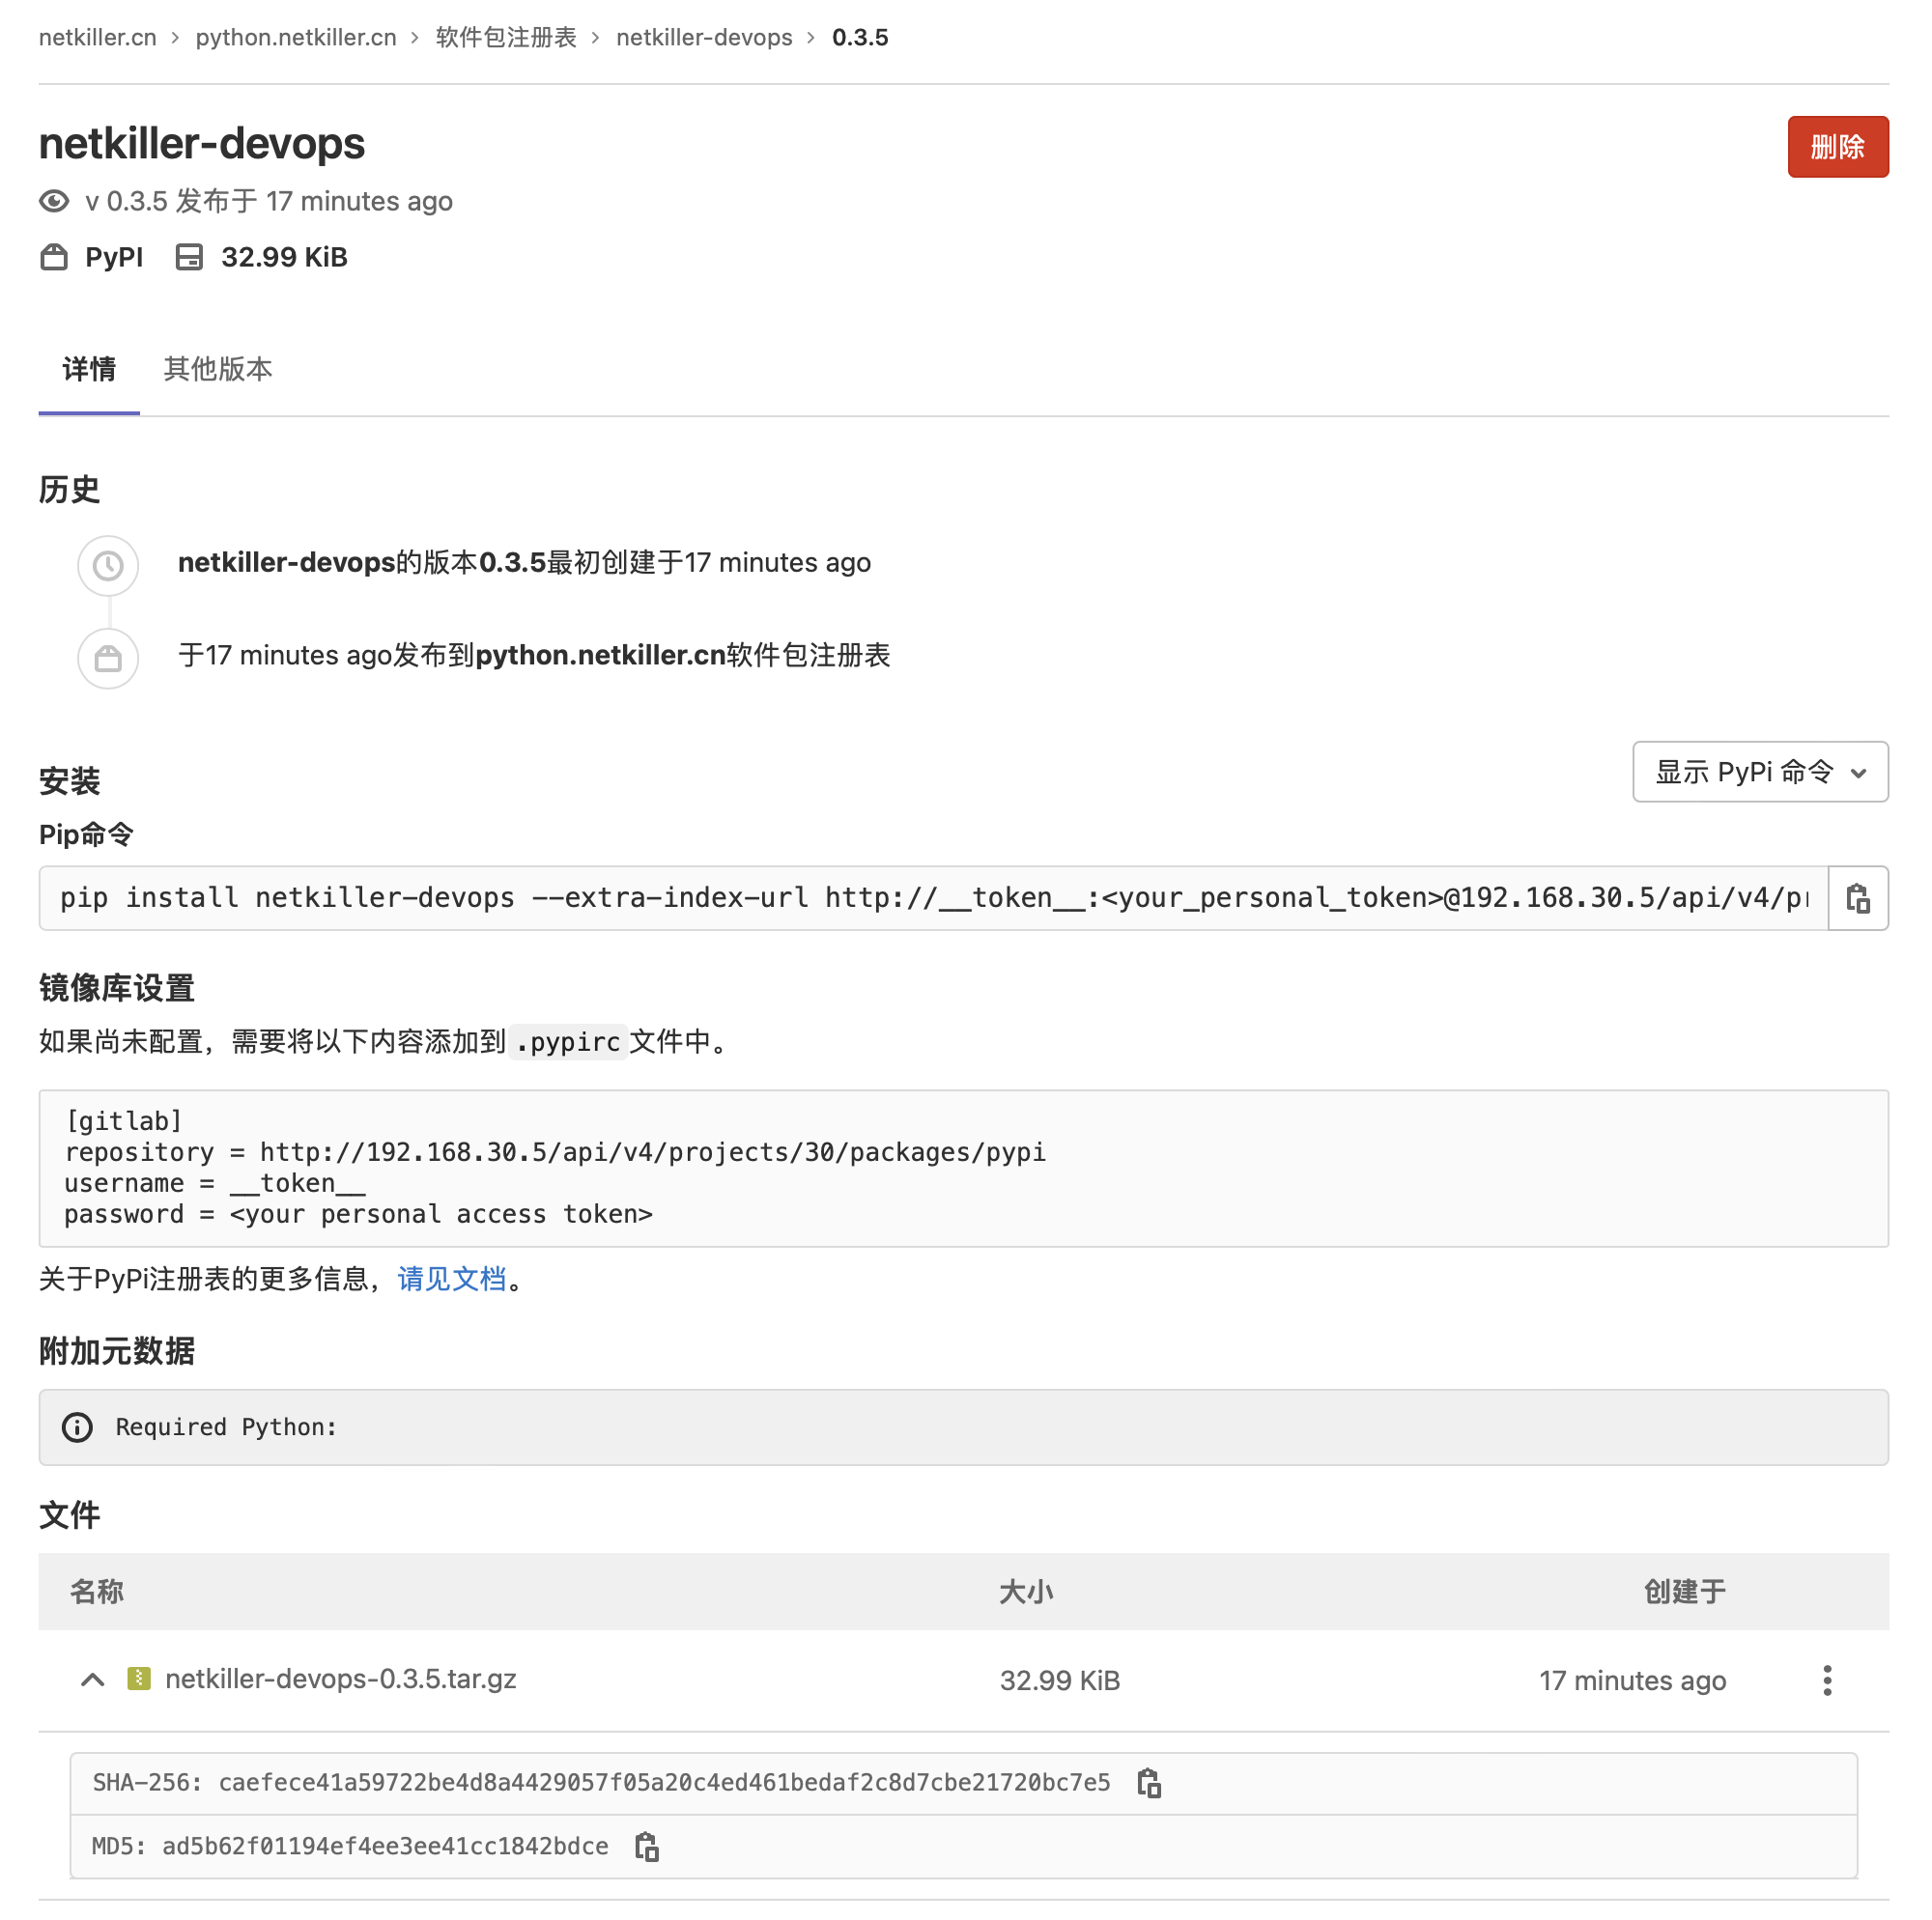 |
登陆 gitlab-runner 所在的服务器,如果只有 python 项目,建议使用 root 账号安装 twine 包
[root@localhost ~]# pip3 install twine
如果 gitlab-runner 是公共服务器,上面还会持续部署其他项目,为了项目更好隔离,可以使用 --user 参数,本地化安装
切换到 gitlab-runner,因为编译和打包,上传包都需要工作在 gitlab-runner 账号下面
[root@localhost ~]# su - gitlab-runner
安装 twine wheel 包
[gitlab-runner@localhost ~]$ pip3 install --user twine wheel
twine 将会被安装到 ~/.local/bin/twine 目录
[gitlab-runner@localhost ~]$ ls ~/.local/bin/twine
/home/gitlab-runner/.local/bin/twine
当然也可以将 twine wheel 放在 .gitlab-ci.yml 文件中,只是每次都安装一次,会影响构建性能。
cache:
  key: "$CI_COMMIT_REF_SLUG"
  paths:
    - dist/
stages:
  - build
  - test
  - deploy

build-job:
  stage: build
  tags:
    - shell
  before_script:
    - pip3 install --user netkiller-devops
    - pip3 install --user wheel twine
  script:
    - python3 setup.py sdist bdist_wheel
  # after_script:

deploy-job:
  stage: deploy
  tags:
    - shell
  before_script:
    - |
      cat > ~/.pypirc <<EOF
      [distutils]
      index-servers =
          gitlab

      [gitlab]
      repository = http://registry.netkiller.cn/api/v4/projects/30/packages/pypi
      username=pypi
      password=TUyGJW89wkdfjdh7QWAe
      EOF
    - cat  ~/.pypirc
  script:
    - ~/.local/bin/twine upload --repository gitlab dist/*
创建项目访问令牌,这里不再赘述,前面已经讲过。
登陆到 gitlab-runner 服务器,安装 Node JS 环境
[root@localhost ~]# dnf install -y nodejs
[root@localhost ~]# npm install -g --registry=https://registry.npm.taobao.org cnpm
[root@localhost ~]# npm install -g --registry=https://registry.npm.taobao.org yarn2
打开 Node JS 项目,编辑 package.json 文件,修改项目名称 加入 scope 例如 "name": "demo" 改为 "name": "@netkiller/demo",设置一个版本号 "version": "0.0.1",然后将 "private": true 改为 "private": false
{
  "name": "@netkiller/demo",
  "version": "0.0.1",
  "private": false,
  "scripts": {
    "start": "node ./bin/www",
    "test": "mocha"
  },
  "dependencies": {
    "cookie-parser": "~1.4.3",
    "debug": "~2.6.9",
    "express": "~4.16.0",
    "http-errors": "~1.6.2",
    "morgan": "~1.9.0",
    "pug": "2.0.0-beta11"
  },
  "devDependencies": {
    "mocha": "^5.1.1",
    "supertest": "^3.0.0"
  }
}
配置 .gitlab-ci.yml 文件
cache:
  paths:
    - node_modules
    - dist

stages:
  - build
  - test
  - deploy

build-job:
  stage: build
  tags:
    - shell
  script:
    - cnpm install

deploy-job:
  stage: deploy
  tags:
    - shell
  script:
    - |
      echo -e "
      @netkiller:registry=http://${CI_SERVER_HOST}/api/v4/projects/${CI_PROJECT_ID}/packages/npm/
      //${CI_SERVER_HOST}/api/v4/projects/${CI_PROJECT_ID}/packages/npm/:_authToken=${CI_JOB_TOKEN}
      " > .npmrc
    - cnpm publish
Gitlab 默认不打开 docker registry 的功能,需要修改配置打开。
修改配置 /etc/gitlab/gitlab.rb 文件,将 registry_external_url 的值修改为 http://registry.netkiller.cn
![[提示]](/graphics/tip.png) | 提示 |
|---|---|
| 注意不能使用IP地址,如果使用IP地址必须配合端口号,且端口不能跟 Gitlab 冲突。 |
[root@gitlab ~]# grep 'registry_external_url' /etc/gitlab/gitlab.rb
# registry_external_url 'https://registry.example.com'
registry_external_url 'http://registry.netkiller.cn'
让配置生效
[root@gitlab ~]# gitlab-ctl reconfigure
检查配置文件
[root@gitlab ~]# cat /var/opt/gitlab/nginx/conf/gitlab-registry.conf
# This file is managed by gitlab-ctl. Manual changes will be
# erased! To change the contents below, edit /etc/gitlab/gitlab.rb
# and run `sudo gitlab-ctl reconfigure`.

## Lines starting with two hashes (##) are comments with information.
## Lines starting with one hash (#) are configuration parameters that can be uncommented.
##
###################################
##         configuration         ##
###################################


server {
  listen *:80;
  server_name registry.netkiller.cn;
  server_tokens off; ## Don't show the nginx version number, a security best practice

  client_max_body_size 0;
  chunked_transfer_encoding on;


  ## Real IP Module Config
  ## http://nginx.org/en/docs/http/ngx_http_realip_module.html

  ## HSTS Config
  ## https://www.nginx.com/blog/http-strict-transport-security-hsts-and-nginx/
  add_header Strict-Transport-Security "max-age=63072000";

  access_log  /var/log/gitlab/nginx/gitlab_registry_access.log gitlab_access;
  error_log   /var/log/gitlab/nginx/gitlab_registry_error.log error;

  location / {

    proxy_set_header Host $http_host;
    proxy_set_header X-Real-IP $remote_addr;
    proxy_set_header X-Forwarded-For $proxy_add_x_forwarded_for;
    proxy_set_header X-Forwarded-Proto http;

    proxy_read_timeout                  900;
    proxy_cache off;
    proxy_buffering off;
    proxy_request_buffering off;
    proxy_http_version 1.1;

    proxy_pass          http://localhost:5000;
  }


}
 |
在 Gitlab Runner 运行的机器上配置 Docker registry
配置 Docker 的 daemon.json 配置文件
{
  "experimental": false,
  "features": {
    "buildkit": true
  },
  "builder": {
    "gc": {
      "defaultKeepStorage": "20GB",
      "enabled": true
    }
  },
  "insecure-registries": [
    "registry.netkiller.cn"
  ]
}
重启 Docker 让 daemon.json
[root@gitlab ~]# systemctl reload docker
我使用的 Docker Desktop for Mac,在 GUI 中配置 daemon.json 然后重启 Docker Desktop
配置 /etc/hosts 文件
Neo-iMac:nginx neo$ grep 'registry' /etc/hosts
192.168.30.5	registry.netkiller.cn
Docker 登陆到 registry.netkiller.cn,登陆可以使用 gitlab 用户和密码,可以使用“个人访问令牌”和“部署令牌”,创建令牌需要给予 read_registry 和 write_registry 权限。
Neo-iMac:nginx neo$ docker login registry.netkiller.cn -u neo
Password:
Login Succeeded
登陆成功会显示 Login Succeeded 并且会在 ~/.docker/config.json 产生配置项
Neo-iMac:nginx neo$ cat ~/.docker/config.json
{
	"auths": {
		"https://index.docker.io/v1/": {},
		"registry.netkiller.cn": {}
	},
	"credsStore": "desktop"
}
构建镜像
Neo-iMac:nginx neo$ docker build -t registry.netkiller.cn/netkiller.cn/java .
[+] Building 4.5s (9/9) FINISHED
 => [internal] load build definition from Dockerfile                                                                                                                                                                                                                 0.3s
 => => transferring dockerfile: 37B                                                                                                                                                                                                                                  0.0s
 => [internal] load .dockerignore                                                                                                                                                                                                                                    0.4s
 => => transferring context: 2B                                                                                                                                                                                                                                      0.0s
 => [internal] load metadata for docker.io/library/nginx:latest                                                                                                                                                                                                      3.1s
 => [auth] library/nginx:pull token for registry-1.docker.io                                                                                                                                                                                                         0.0s
 => [1/4] FROM docker.io/library/nginx:latest@sha256:dfef797ddddfc01645503cef9036369f03ae920cac82d344d58b637ee861fda1                                                                                                                                                0.0s
 => CACHED [2/4] RUN apt update -y && apt install -y procps                                                                                                                                                                                                          0.0s
 => CACHED [3/4] RUN apt install -y iproute2 net-tools                                                                                                                                                                                                               0.0s
 => CACHED [4/4] WORKDIR /opt                                                                                                                                                                                                                                        0.0s
 => exporting to image                                                                                                                                                                                                                                               0.4s
 => => exporting layers                                                                                                                                                                                                                                              0.0s
 => => writing image sha256:549089448b9450a2515fd4653f35c4bb828079624edcbdbc2f0607ba3656598b                                                                                                                                                                         0.0s
 => => naming to registry.netkiller.cn/netkiller.cn/java
推送镜像
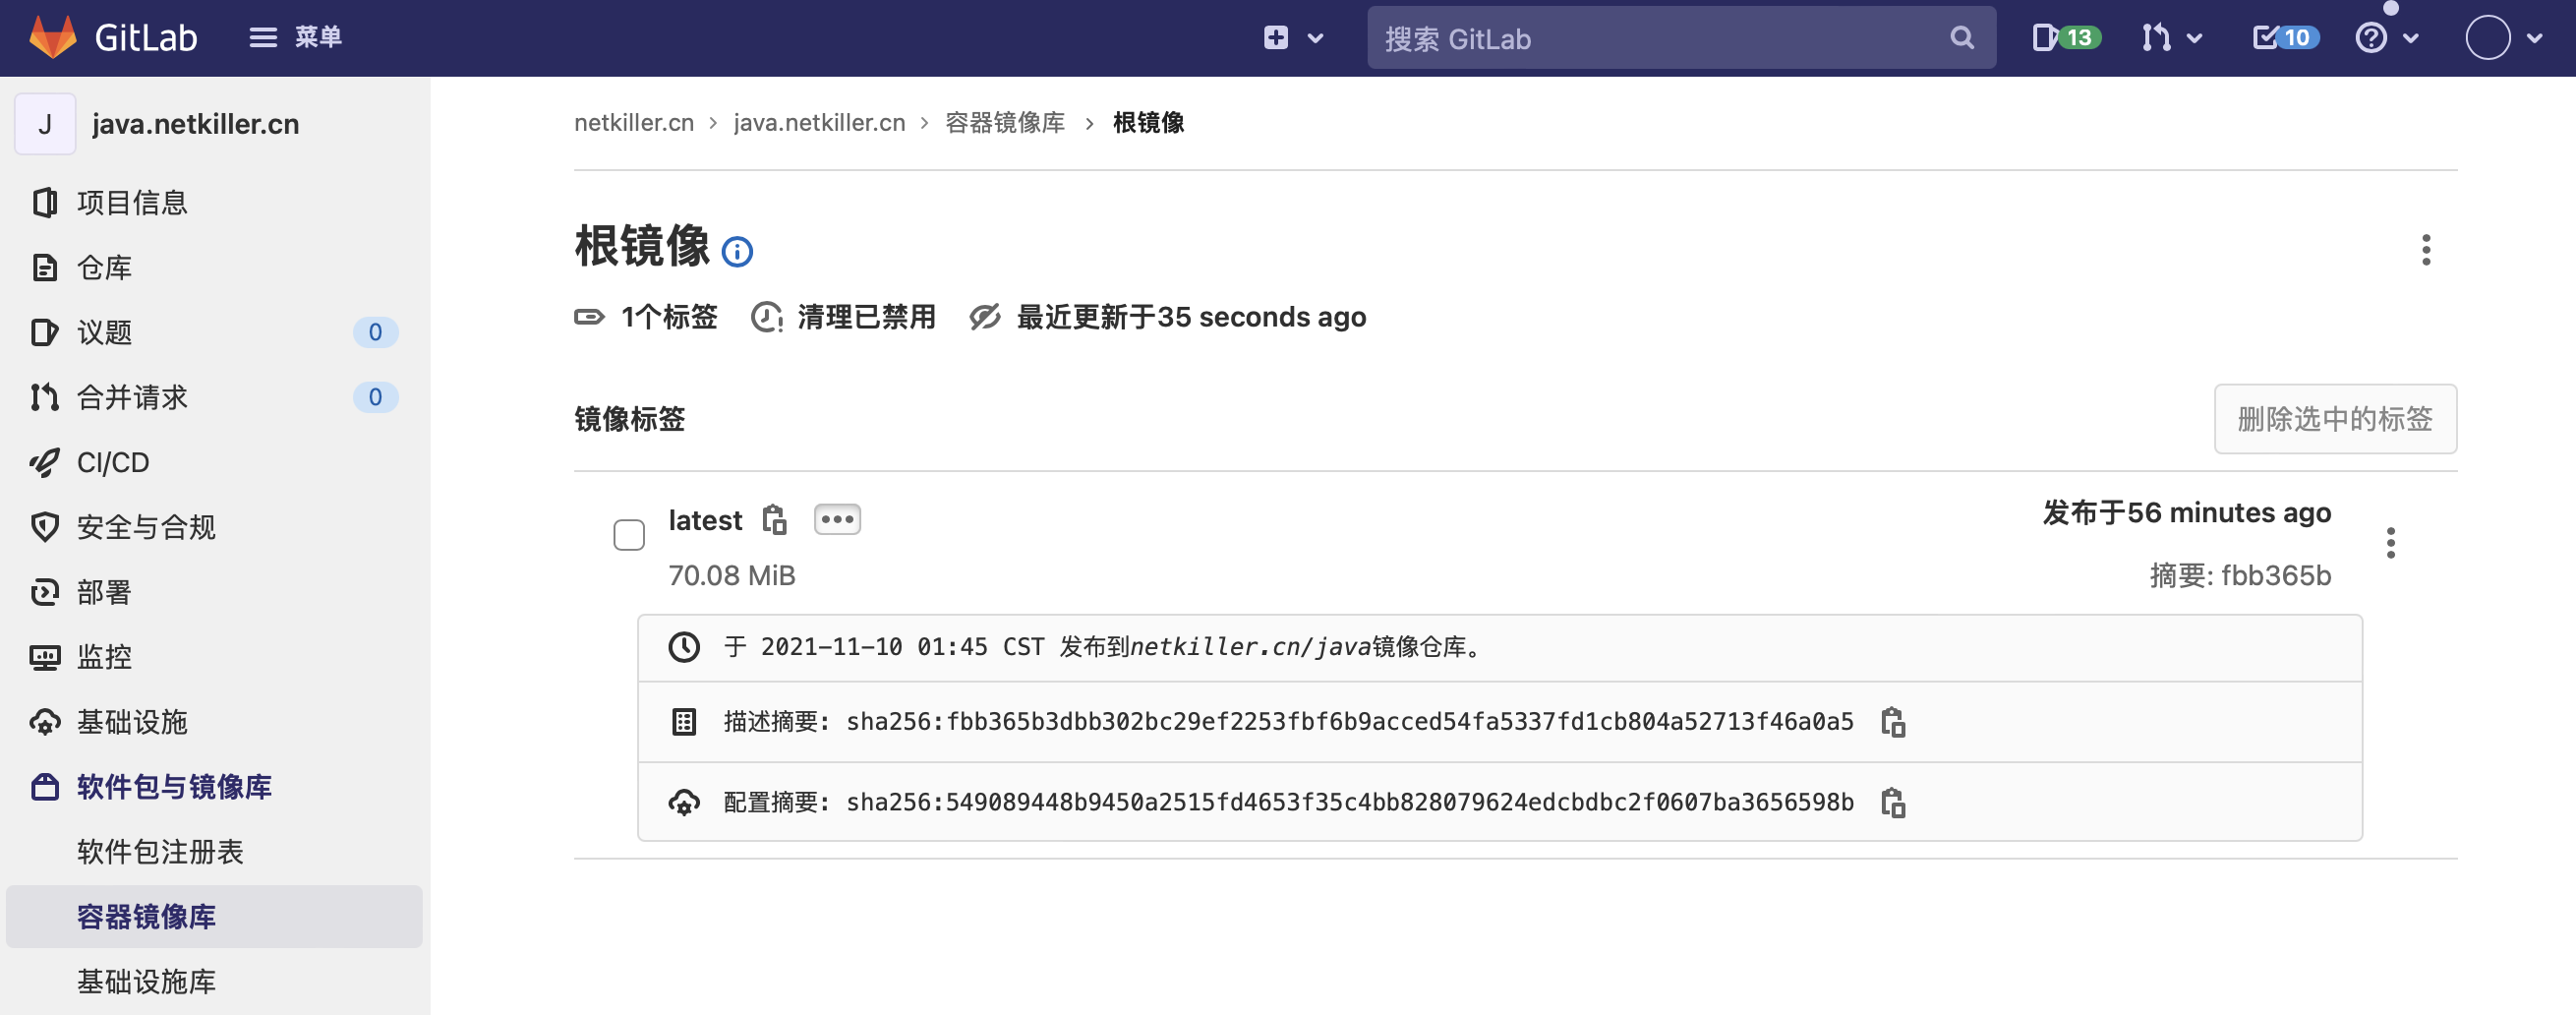
Neo-iMac:nginx neo$ docker push registry.netkiller.cn/netkiller.cn/java
Using default tag: latest
The push refers to repository [registry.netkiller.cn/netkiller.cn/java]
5f70bf18a086: Pushed
2d4c9573c0b6: Pushed
a8935bae4a3d: Pushed
280fbd619253: Pushed
921ee7f55927: Pushed
fc199aaed79a: Pushed
38aec0f8e5ed: Pushed
ea56d6ebf7e5: Pushed
e8b689711f21: Pushed
latest: digest: sha256:fbb365b3dbb302bc29ef2253fbf6b9acced54fa5337fd1cb804a52713f46a0a5 size: 2199
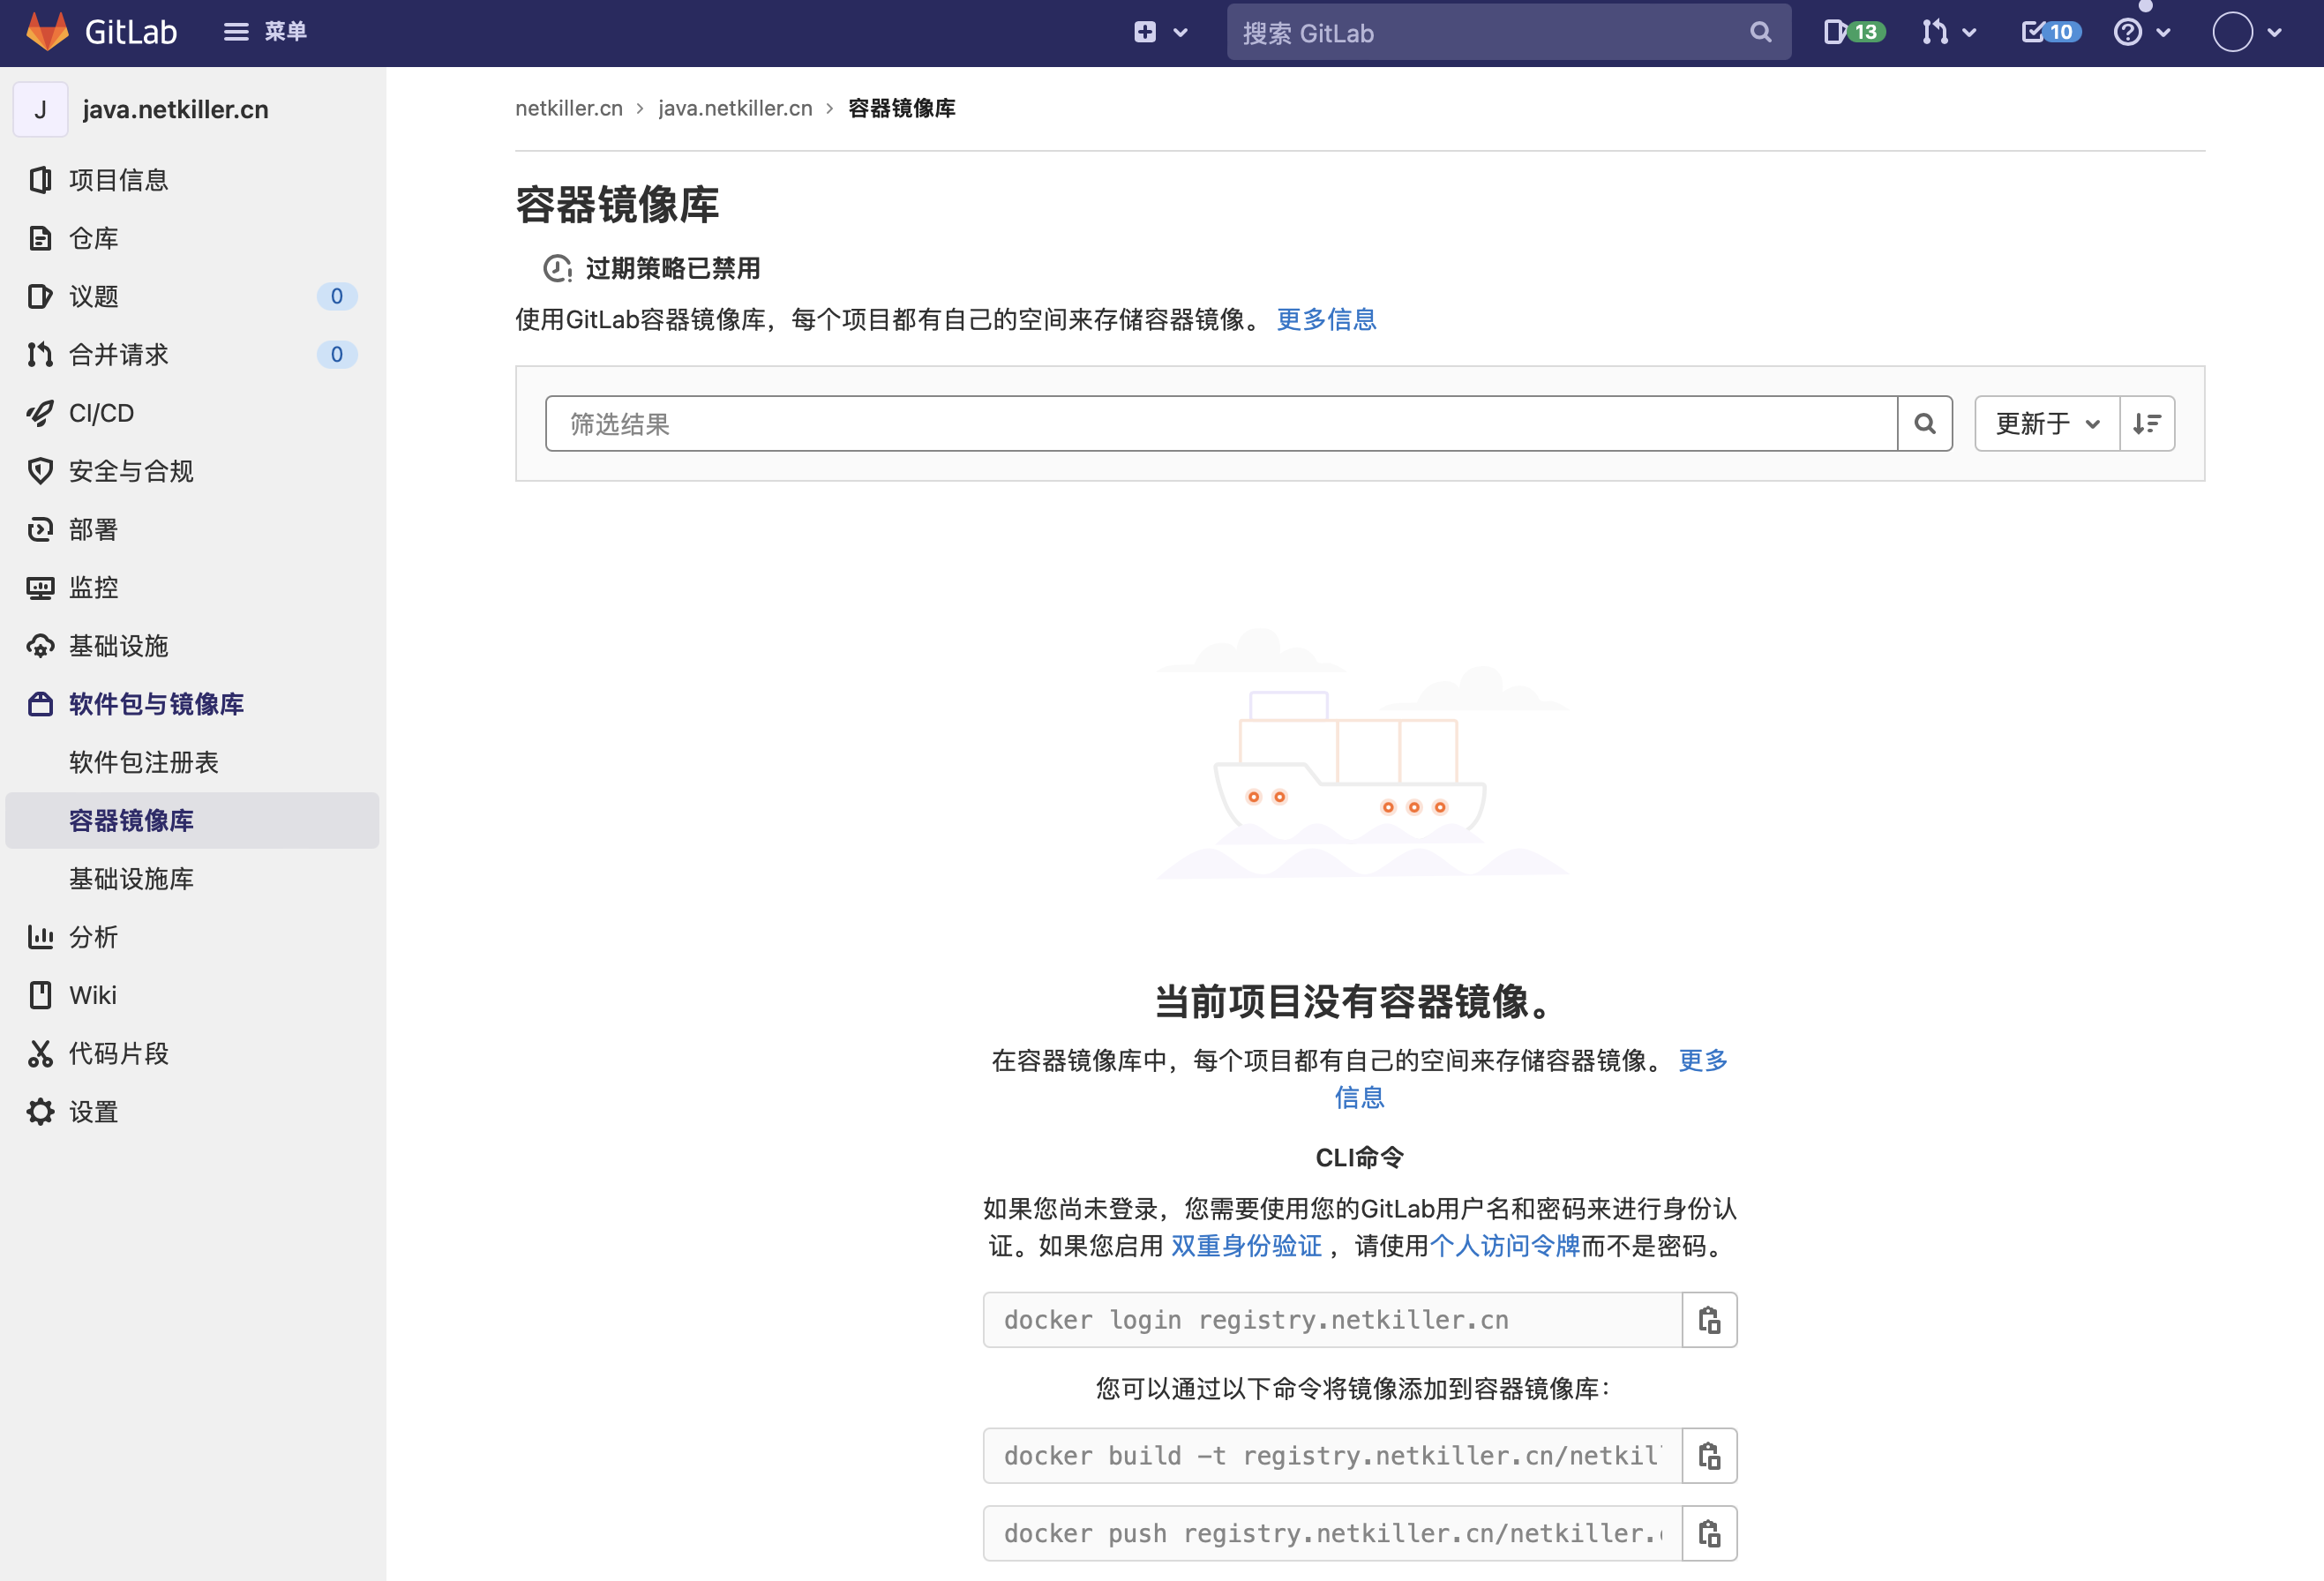
推送完成后,前往“容器镜像库”可以看到镜像
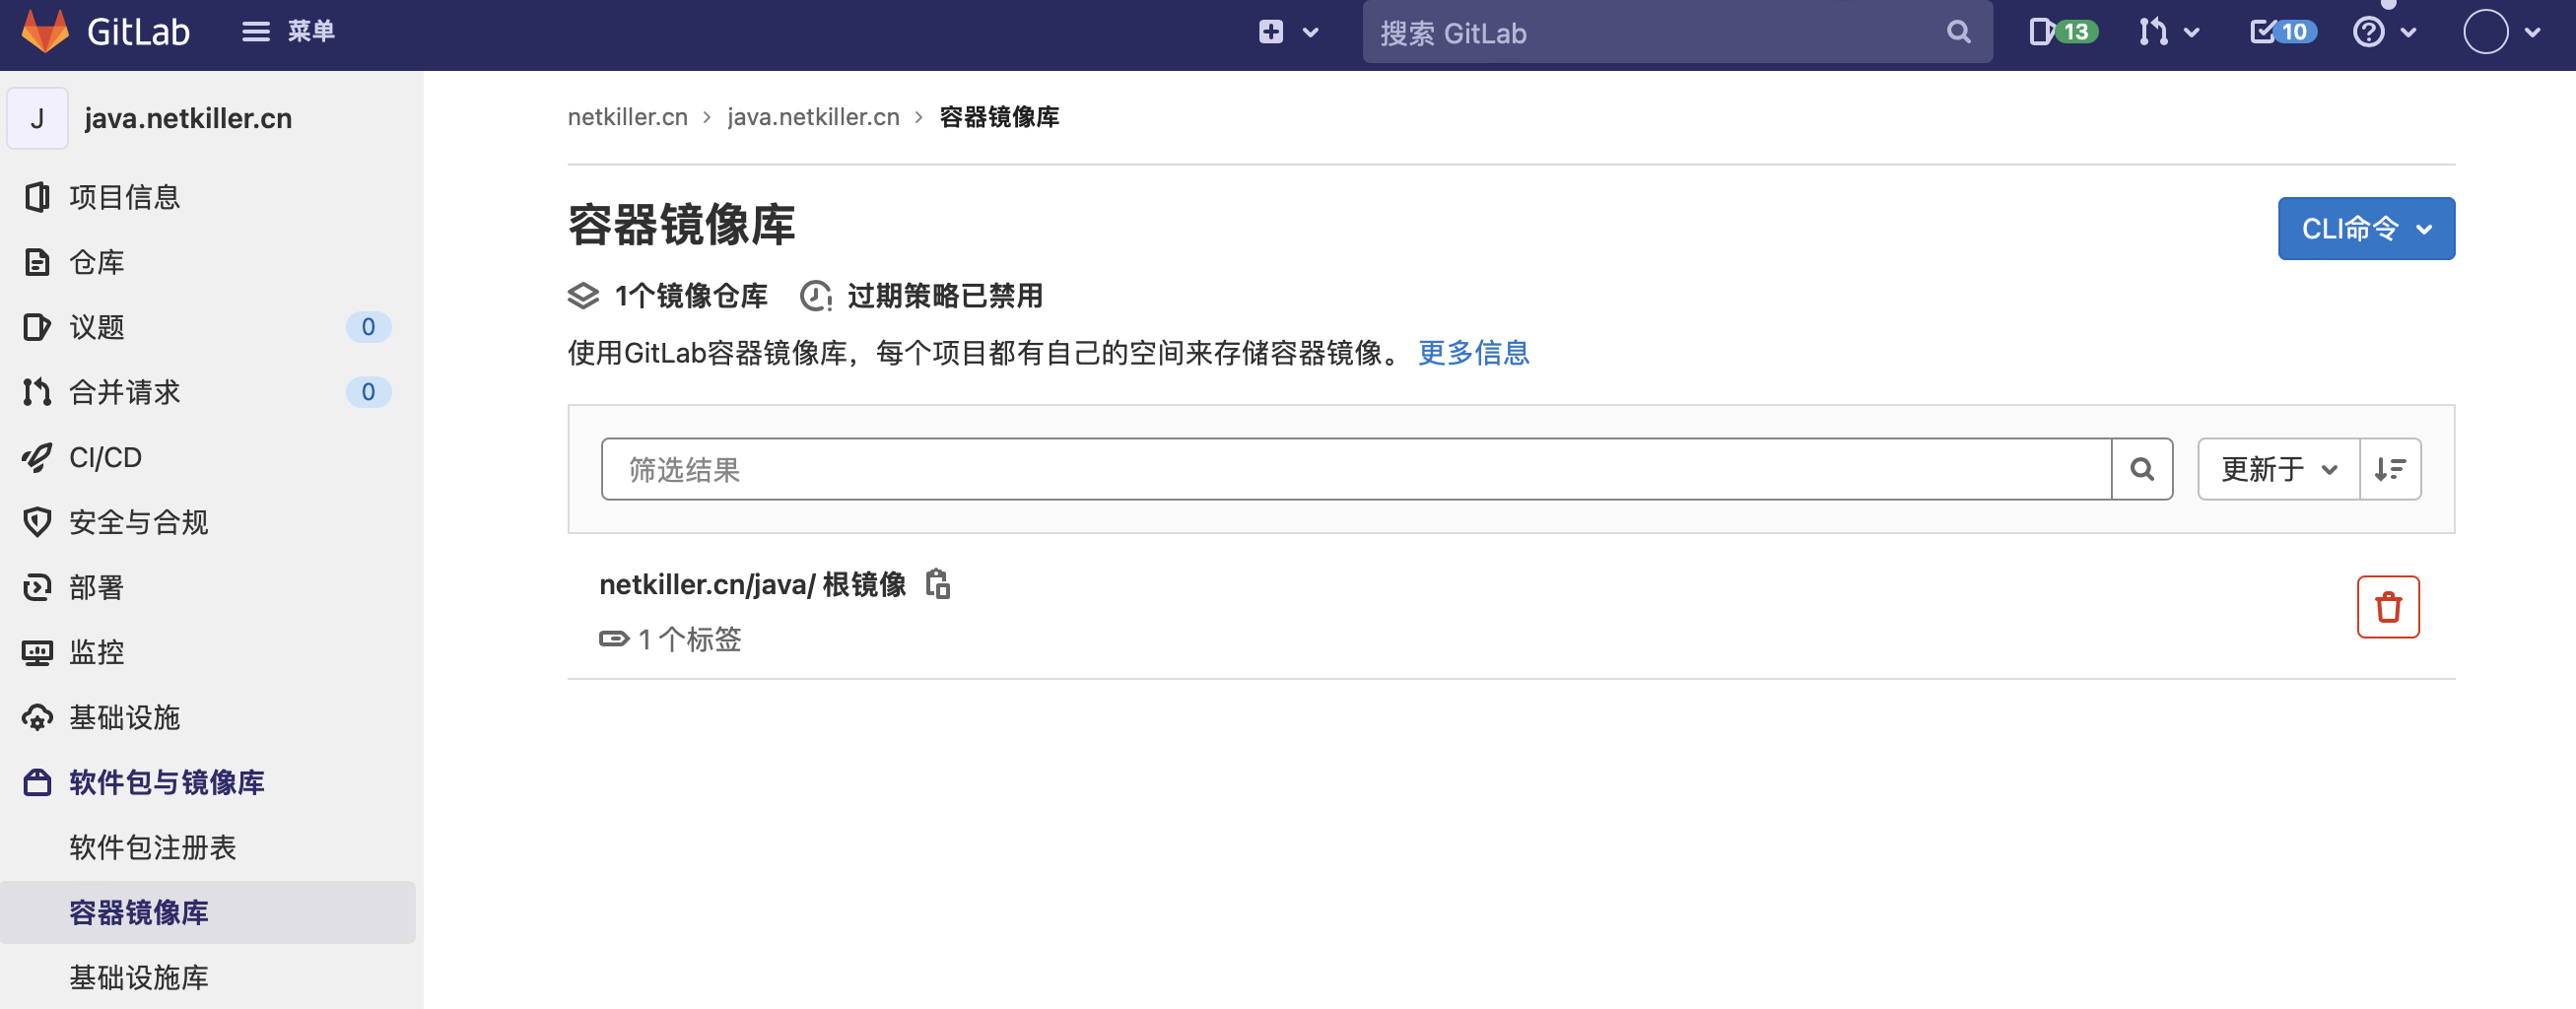 |
查看镜像
 |
Maven 项目
pom.xml 中添加
	<properties>
        <project.build.sourceEncoding>UTF-8</project.build.sourceEncoding>
        <project.reporting.outputEncoding>UTF-8</project.reporting.outputEncoding>
        <java.version>1.8</java.version>
        <docker.registry>registry.netkiller.cn</docker.registry>
        <docker.registry.name>netkiller.cn</docker.registry.name>
        <docker.image>api.netkiller.cn</docker.image>
        <docker.baseImage>openjdk:8-alpine</docker.baseImage>
    </properties>
plugins 插件添加
 			<plugin>
				<groupId>com.spotify</groupId>
				<artifactId>docker-maven-plugin</artifactId>
				<version>1.2.2</version>
				<configuration>
					<!-- <imageName>${docker.registry}/${docker.registry.name}/${project.artifactId}</imageName> -->
                    <imageName>${docker.registry}/${docker.registry.name}/${docker.image}</imageName>
					<baseImage>${docker.baseImage}</baseImage>
					<maintainer>netkiller@msn.com</maintainer>
					<volumes>/tmp</volumes>
					<workdir>/srv</workdir>
					<env>
						<JAVA_OPTS>-server -Xms512m -Xmx4096m -Djava.security.egd=file:/dev/./urandom</JAVA_OPTS>
					</env>
					<exposes>8080</exposes>
					<entryPoint>["sh", "-c", "java ${JAVA_OPTS} -jar /srv/${project.build.finalName}.jar"]</entryPoint>
					<resources>
						<resource>
							<targetPath>/srv</targetPath>
							<directory>${project.build.directory}</directory>
							<include>${project.build.finalName}.jar</include>
						</resource>
					</resources>
					<registryUrl>http://${docker.registry}/v2/</registryUrl>
					<imageTags>
						<imageTag>${project.version}</imageTag>
						<imageTag>latest</imageTag>
					</imageTags>
				</configuration>
			</plugin>
.gitlab-ci.yml
docker:
  stage: deploy
  before_script:
    - echo "glpat-amwpx6FWS1_mHTNUV7RU" | docker login -u "docker" --password-stdin registry.netkiller.cn
  script:
    - mvn docker:build && mvn docker:push
  after_script:
    - wechat -t 1 api.netkiller.cn Docker 镜像制作完成 http://192.168.30.5/netkiller.cn/api.netkiller.cn/container_registry
  when: manual
  allow_failure: true
  only:
    - testing
下面在给一个 node js 项目的例子
准备 Dockerfile 文件
FROM nginx:alpine
LABEL author="neo"
VOLUME /etc/nginx
COPY dist/ /usr/share/nginx/html/
EXPOSE 80
WORKDIR /usr/share/nginx/html/
.gitlab-ci.yml
cache:
  key: ${CI_COMMIT_REF_SLUG}
  paths:
    - node_modules/
    - dist/
    - .sonar/

stages:
  - build
  - test
  - deploy
  - release

deploy feature:
  stage: build
  # variables:
  environment:
    name: feature
    url: https://www.netkiller.cn
  only:
    - /^feature\/.*/
    - feature
  tags:
    - cloud
  before_script:
    - cnpm install
    - rm -rf dist/*
    - cnpm run build:stage
  after_script:
    - wechat -t 1 www.netkiller.cn $CI_COMMIT_AUTHOR 在 $CI_COMMIT_BRANCH 环境部署完成
    - voice feature 环境部署完成
  script:
    - sed -i "s/{{description}}/$(date +"%Y-%m-%d %H:%M:%S")/" dist/index.html
    # - rsync -auv --delete dist/* /opt/netkiller.cn/car.netkiller.cn/
    - rm -rf /opt/netkiller.cn/car.netkiller.cn/*
    - \cp -af dist/* /opt/netkiller.cn/car.netkiller.cn/

feature docker:
  stage: deploy
  # variables:
  environment:
    name: feature
    url: https://www.netkiller.cn
  only:
    - /^feature\/.*/
    - feature
  tags:
    - cloud
  before_script:
    - echo "glpat-amwpx6FWS1_mHTNUV7RU" | docker login -u "docker" --password-stdin registry.netkiller.cn
  after_script:
    - docker push registry.netkiller.cn/netkiller.cn/www.netkiller.cn -a
    - wechat -t 1 www.netkiller.cn $CI_COMMIT_AUTHOR 在 $CI_COMMIT_BRANCH Docker 镜像构建完成
    - voice feature 环境部署完成
  script:
    - docker build -t "registry.netkiller.cn/netkiller.cn/www.netkiller.cn:$(date +%Y-%m-%d.%H%M)" .

release-job:
  stage: release
  tags:
    - shell
  only:
    - master
  script:
    - |
      echo -e "
      @sfzito:registry=http://${CI_SERVER_HOST}/api/v4/projects/${CI_PROJECT_ID}/packages/npm/
      //${CI_SERVER_HOST}/api/v4/projects/${CI_PROJECT_ID}/packages/npm/:_authToken=${CI_JOB_TOKEN}
      " > .npmrc
    - cnpm publish
  when: manual
使用 ${CI_COMMIT_SHORT_SHA} 版本号作为镜像版本
feature docker:
  stage: deploy
  # variables:
  environment:
    name: feature
    url: https://admin.netkiller.cn
  only:
    - /^feature\/.*/
    - feature
  tags:
    - cloud
  before_script:
    - echo "glpat-amwpx6FWS1_mHTNUV7RU" | docker login -u "docker" --password-stdin registry.netkiller.cn
  after_script:
    - docker push "registry.netkiller.cn/netkiller.cn/admin.netkiller.cn:${CI_COMMIT_SHORT_SHA}"
    - wechat -t 1 admin.netkiller.cn $CI_COMMIT_AUTHOR 在 $CI_COMMIT_BRANCH Docker 镜像构建完成
    - voice feature 环境部署完成
  script:
    - docker build -t "registry.netkiller.cn/netkiller.cn/admin.netkiller.cn:${CI_COMMIT_SHORT_SHA}" .